Content
- Overview
- What you will need
- Link to installation media
- Installing a hypervisor
- Setting up virtual switch
- Installation of vyOs
- Installation of ubuntu desktop
- Installation of Kali Linux
- Installation of Metasploitable2
- Conclusion
Overview
A virtual laboratory is a simulated environment that allows students, researchers, or professionals to perform laboratory experiments. Unlike traditional laboratory settings, virtual laboratories don’t require any physical equipment or materials.
In the case of computing, a virtual laboratory allows you to have access to hardware components on which you can test software applications and network configuration without worrying about the cost or the risk of damaging newly acquired equipment.
Overall, virtual laboratories offer a flexible and accessible way to explore new network concepts, conduct experiments, and try and develop malware with more flexibility and less risk.
What You Will Need

Before you start this tutorial
-
Software requirements : A computer with a Linux desktop, preferably a Debian-based distribution.
-
Hardware requirements : A computer manufactured after 2014 with at least 4 cores of CPU, at least 8 GB of RAM, and at least 100 GB of storage for the Linux partition.
-
Prerquise : Familiarity with the Linux operating system, knowing how to install applications via the terminal and how to use a text editor such as vim or nano . Don’t be the type to give up at the first obstacle. read carefully, use google, and don’t let the documentation scare you. Good luck!
Link to installation media
We will install a set of operating systems , they can be downloaded from the links below:
-
VyOs a open source router and firewall : Download here.
-
Virtual image for qemu of kali linux linux distribution for penetration testing Download link.
-
A ubuntu desktop : Download here.
-
Metasploitable2 a Linux server with security flaws : Download here.
Installing A Hypervisor
What Is A Hypervisor
A hypervisor, also called a virtual machine manager, is a software layer that allows you to run multiple virtual machines (VMs) on a single physical host computer. A hypervisor creates a virtualized environment in which multiple operating systems can run simultaneously on the same physical hardware.
Linux-based operating systems support all mainstream hypervisors such as Virtualbox, VMware, etc., but for better performance, KVM (Kernel Based Virtual Machine) is the recommended software.
Verify Virtualisation Support
To make use of virtualization it is required that the virtualization module for the cpu have been activated , on your linux host machin open a terminal and enter egrep -c '(vmx|svm)' /proc/cpuinfo to verify if virtualization is enabled , if the command return 0 that will mean that virtualization is not enabled in your BIOS setting
$egrep -c '(svm|vmx)' /proc/cpuinfo
16
- We ask the number of line that contain ‘svm’ or ‘vmx’ in the file /proc/cpuinfo
Install KVM with package manager
We need to install the packages qemu-kvm, libvirt-daemon-system, libvirt-clients, bridge-utils and virt-manager using the package manager , apt for debian
$sudo apt-get install qemu-kvm libvirt-daemon-system libvirt-clients bridge-utils virt-manager
If the installation is done we can check if the libvirt deamon is running sudo systemctl status libvirtd |grep Active
$sudo systemctl status libvirtd | grep Active
    Active: active (running) since Sat 2023-04-08 07:06:44 CAT; 6h ago
- If the command return inactive (dead) you need to start the process and check again :
sudo systemctl start libvirtd && systemctl status libvirtd |grep Active.
Now we will add our current user to the libvirt group
$sudo adduser 'username' libvirt
- Replace ‘username’ with the appropriate user for your computer and reboot or log out and log back in for the changes to take effect.
- Now verify that you are in libvirt group with
groups:
$groups
0script cdrom floppy sudo audio dip video plugdev netdev bluetooth libvirt lpadmin scanner docker
- If the output do not contain libvirt make sure that you logged out and relogged in after adding user to the group .
Setting Up Virtual Switch
Libvirt uses the concept of a virtual network switch : a software construction on the host machine, that your virtual machines “plug in” to, and direct their traffic through.
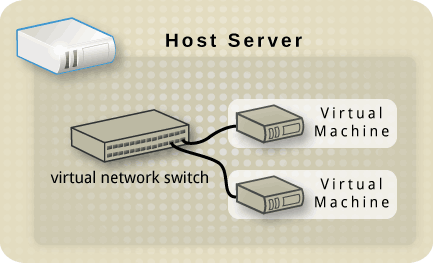
In our network, we will have 2 virtual switches: one in NAT mode that will have access to the internet, and one in isolated mode that will create a private LAN.
The VyOs router will be connected to both the NAT and the private network and will allow the machine on the private network to access the internet.
Activating Default NAT Interface
The libvirt package comme with a default NAT configuration that we can activate with the following step :
- Load the xml configuration with
sudo virsh net-define
$sudo virsh net-define /usr/share/libvirt/network/default.xml
- Than activate the interface using :
sudo virsh net-start default
$sudo virsh net-start default
[sudo] password for 0script:
Network default started
- Check for libvirt the interfaces with
virs net-list, this command shows only activated interfaces :
$sudo virsh net-list
[sudo] password for 0script:
 Name      State    Autostart   Persistent
--------------------------------------------
 default   active   no          yes
Creation Of Virtual Switch In Isolated Mode
In libvirt, virtual switches are defined using XML files. Create a file named private.xml to set up the virtual switch, open it with a text editor, and put the following inside:
<network>
    <name>private</name>
    <bridge name="virbr1" />
    <ip address="192.168.152.1" netmask="255.255.255.0">
        <dhcp>
            <range start="192.168.152.2" end="192.168.152.254" />
        </dhcp>
    </ip>
    <ip family="ipv6" address="2001:db8:ca2:3::1" prefix="64" />
</network>
- name : Interface name
- bridge : Virtual switch name libvirt create a default name for libvirt start with virbr ending with an interger .
- ip : Define ip address type (v4/v6) addresses range and netmask
- dhcp : Enable and set dhcp for the network .
Define and activate the virtual switch with : virsh net-create private.xml
$sudo virsh net-create private.xml
[sudo] password for 0script:
Network private created from private.xml
If everything went as expected, you should see both of our virtual interfaces with sudo virsh net-list
$sudo virsh net-list
[sudo] password for 0script:
 Name      State    Autostart   Persistent
--------------------------------------------
 default   active   no          yes
 private   active   no          no
Installation Of VyOs
If you have not downloaded VyOs use the link to download .
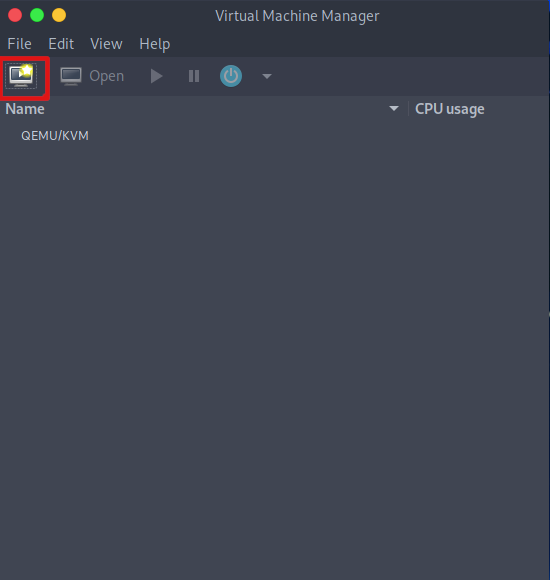
- If you completed downloading vyos router ,on your computer you can search for the virt manager application and run it .

-
Start to create a new virtual machine using the top left button
-
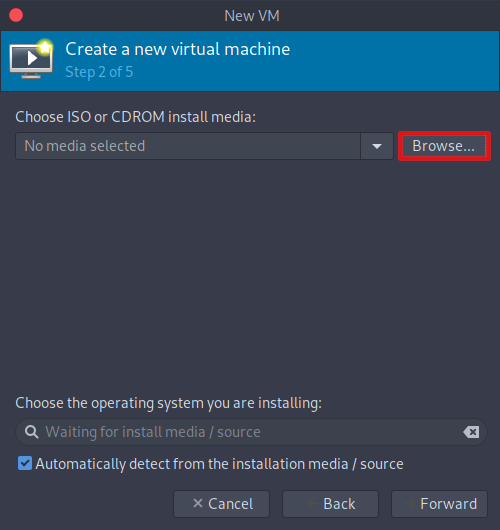
Here you chose the type of installation media for the operating system; for VyOS you downloaded an ISO file, so you can just click forward on this step.

-
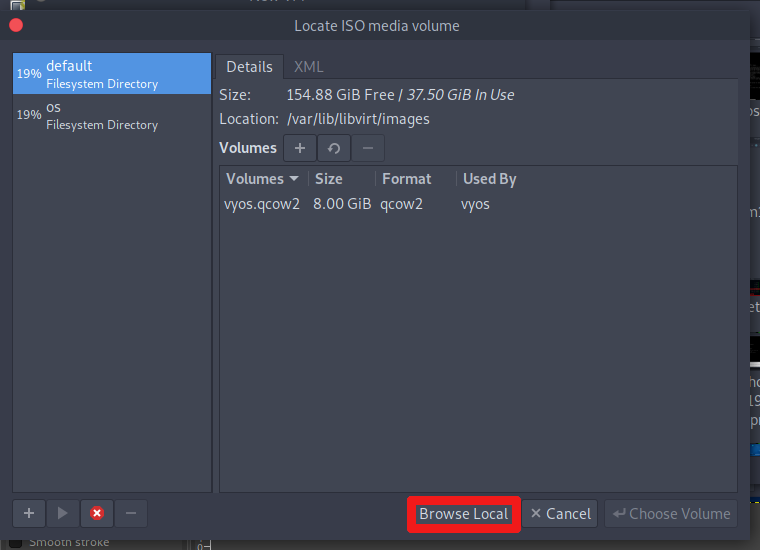
To access the file on your local computer, select the “Browse Local” button, then navigate to the folder containing the VyOs ISO file.
- Uncheck the box next to Automatic OS Selection after choosing the ISO file, then type Generic OS into the search box. When finished, it should look like this :
- In this part we set the virtual CPU and RAM, for or use case 2 core for CPU and 1GB of RAM should be enough, and just after for the virtual hard drive I put 8GB.
- Giving the machine a name and choosing a virtual switch are the final steps of installation. I give my machine the name VyOs and utilize the default switch.
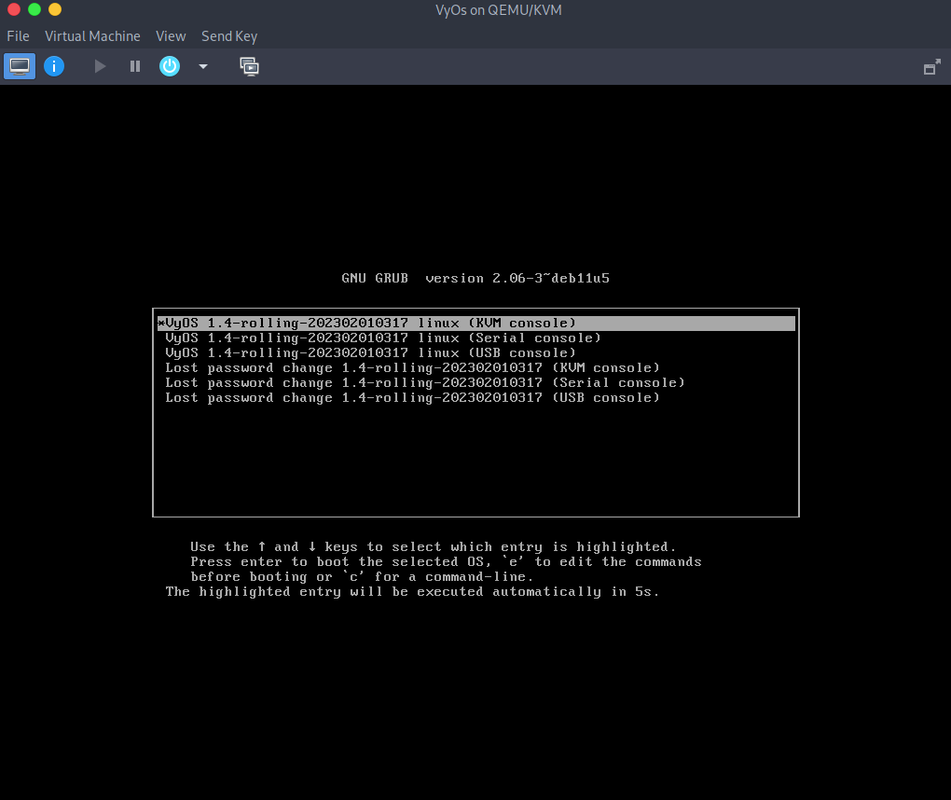
- When the installation on the Vyos system is complete, hit Enter to launch live mode.
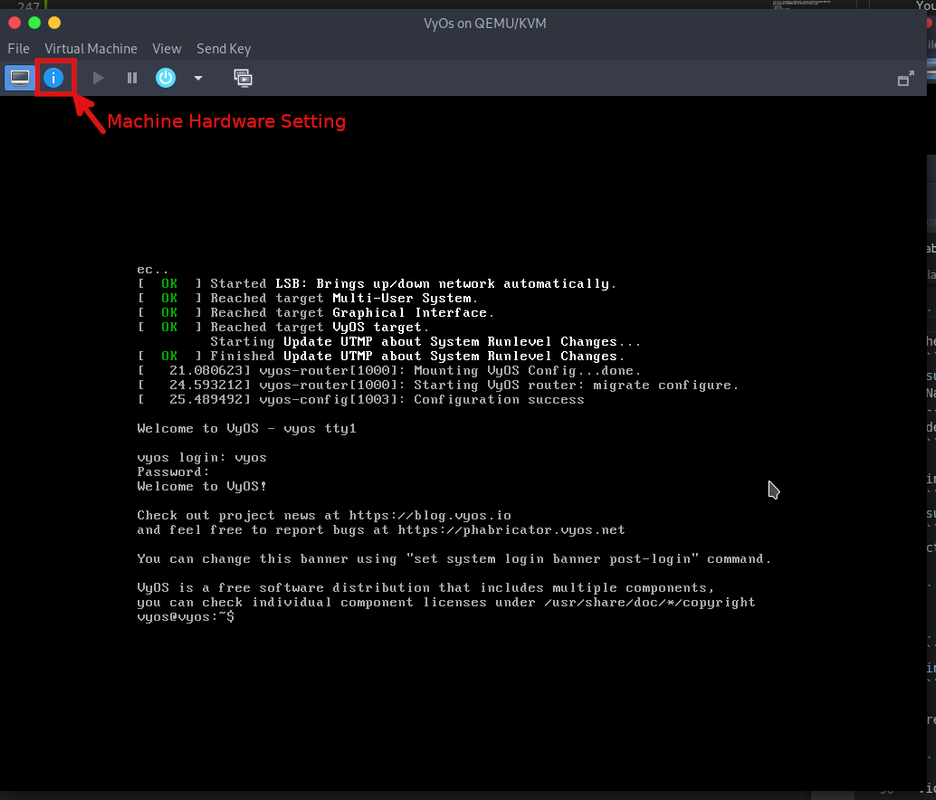
- Use default user “vyos” and password “vyos” to log in
Setting up VyOs

Install image
Run the commande “install image” on the shell in order to use the installation wizard to complete the installation.
vyos@vyos:~$ install image
Welcome to the VyOS install program.  This script
will walk you through the process of installing the
VyOS image to a local hard drive.
Would you like to continue? (Yes/No) [Yes]: Yes  # Pressing Enter i.e to Yes
Probing drives: OK
Looking for pre-existing RAID groups...none found.
The VyOS image will require a minimum 2000MB root.
Would you like me to try to partition a drive automatically
or would you rather partition it manually with parted?  If
you have already setup your partitions, you may skip this step

Partition (Auto/Parted/Skip) [Auto]:    # Press Enter i.e to the default option here [Auto]

I found the following drives on your system:sda    4294MB

Install the image on? [sda]:    # Press Enter to select default option

This will destroy all data on /dev/sda. Continue? (Yes/No) [No]: Yes    # The instalation has started

How big of a root partition should I create? (2000MB - 4294MB) [4294]MB: # Press Enter to select default option

Creating filesystem on /dev/sda1: OK
Done!
Mounting /dev/sda1...
What would you like to name this image? [1.2.0-rolling+201809210337]:
OK.  This image will be named: 1.2.0-rolling+201809210337
Copying squashfs image...
Copying kernel and initrd images...
Done!
I found the following configuration files:/opt/vyatta/etc/config.boot.default
Which one should I copy to sda? [/opt/vyatta/etc/config.boot.default]:  # Press Enteror Yes to select default option

Copying /opt/vyatta/etc/config.boot.default to sda.
Enter password for administrator account  # setting up new  password
Enter password for user 'vyos':
Retype password for user 'vyos':
I need to install the GRUB boot loader.
I found the following drives on your system:
sda    4294MB

Which drive should GRUB modify the boot partition on? [sda]:    # Press Enter or Yes to select default option

Setting up grub: OK
Done!
- Restart the machine with the command
rebootto make the change take effect.
vyos@vyos:~$ reboot
Proceed with reboot? (Yes/No) [No] Yes
Adding private network interface
We need to add a second network interface to VyOs .
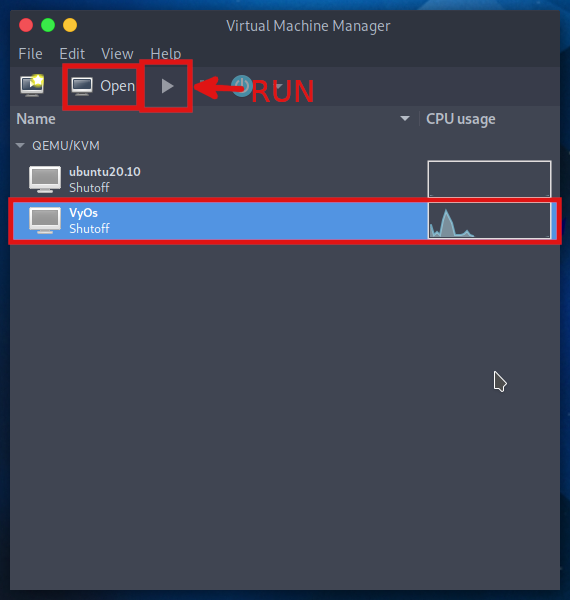
If your VyOS machine is not running, you can start it with the run button of the virt-manager interface.
We use virt manager to add a network interface to VyOs .
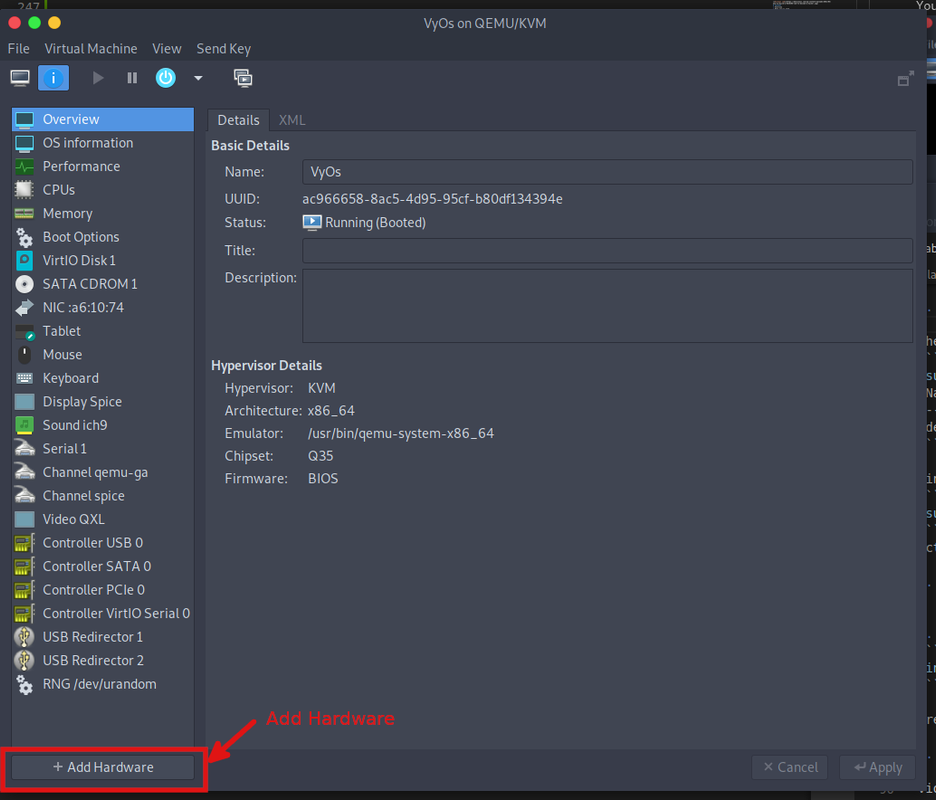
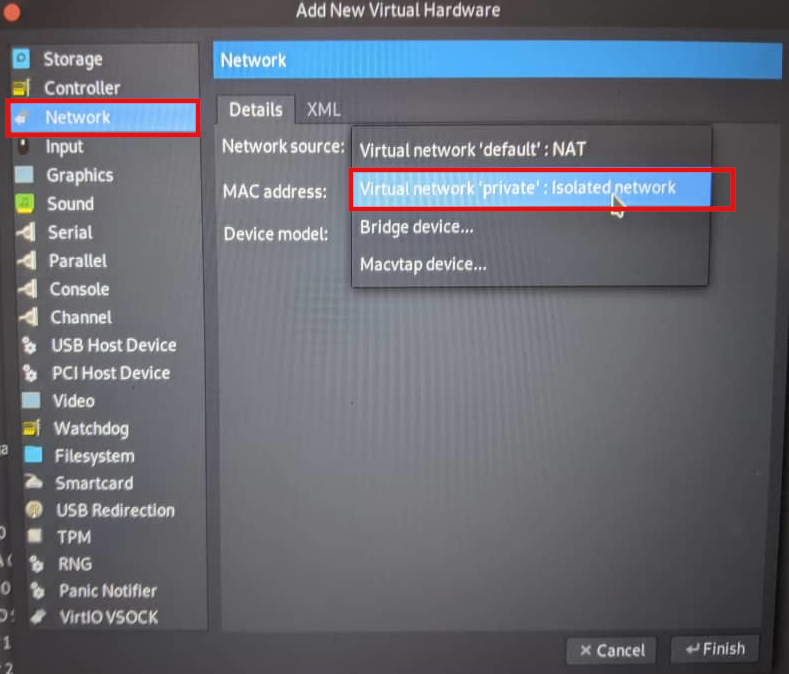
Show Virtual Hardware detail > Add Hardware > Network > Network Source > Select the private Network Interface > Finish
- Enter virtual machine hardware configuration .
- Hit ‘
Add Hardware Button’ button .
- Select ‘
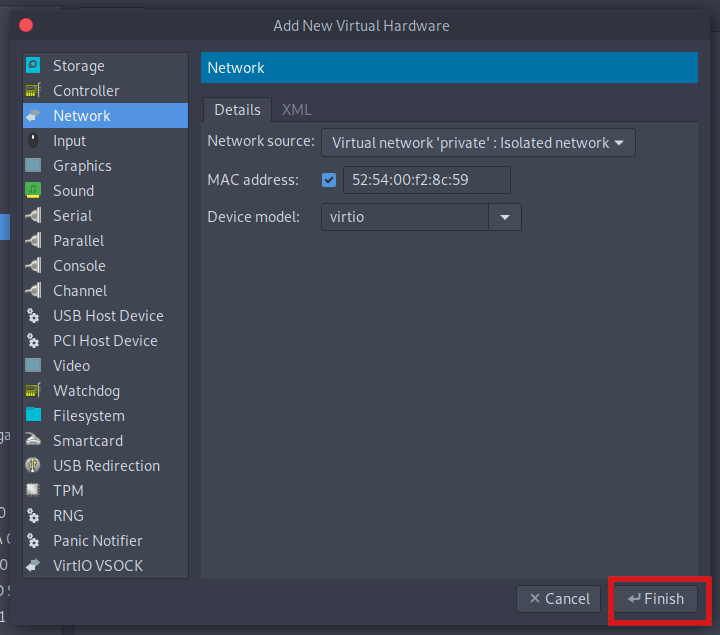
Network’ than in ‘Network source’ select your private virtual switch .
- After finishing, the window should look something like this:
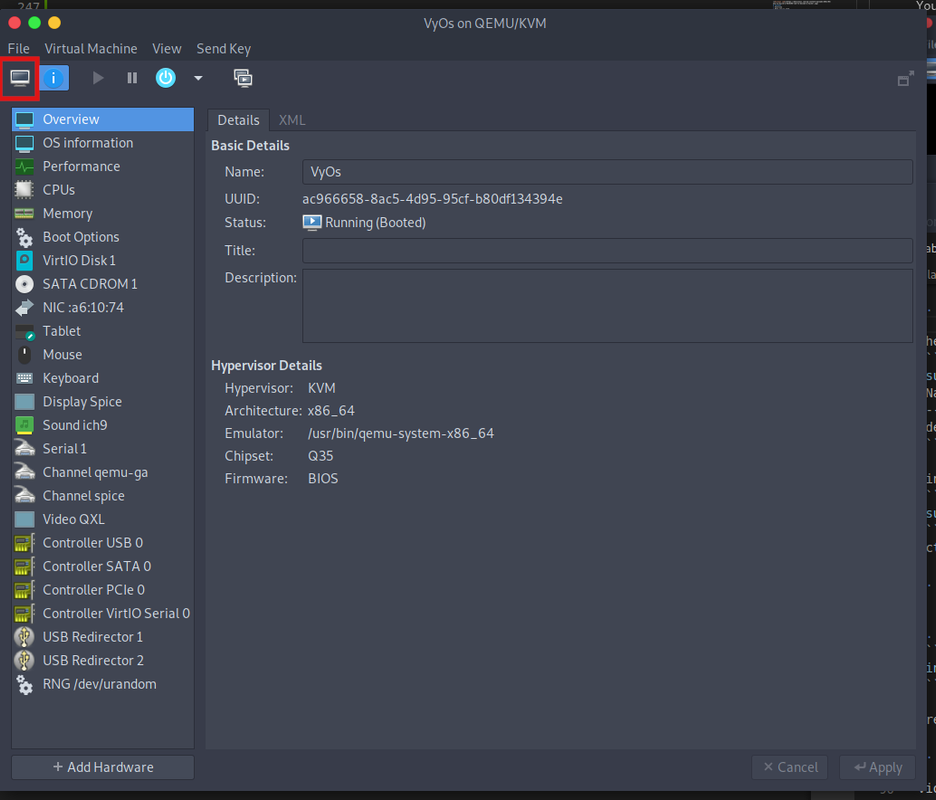
- Return to the VyOs shell with top left button
Show The Graphical Console
- Reboot the machine to make the change effective.
vyos@vyos:~$ reboot
Proceed with reboot? (Yes/No) [No] Yes
VyOs Configuration of the LAN
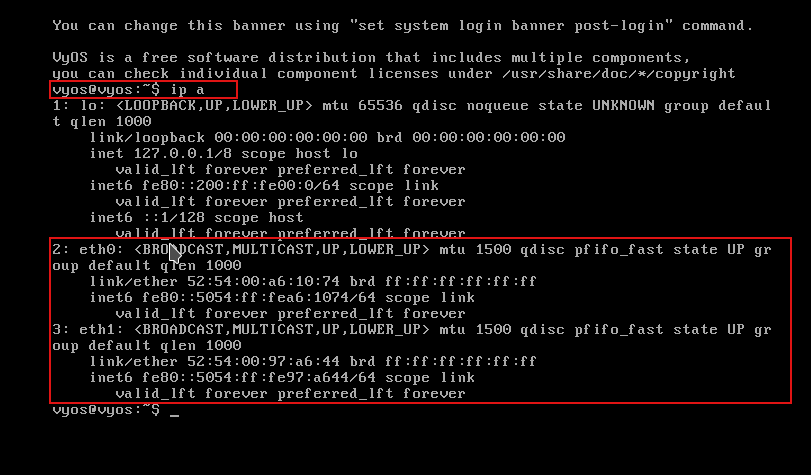
Check to see if there are two network interfaces on the VyOs machine with ip a or ip link show or show interfaces:
In order to connect with the outside world, our network we will be using eth0 interface, which will receive its address via DHCP. And eth1 will serve for the LAN with a static address set to 192.168.152.10.
To make those changes in VYOS, enter configuration mode with the command configure. You know you are in configuration mode when the shell displays #
vyos@vyos$ configure
vyos@vyos#
DHCP/DNS setting
In configuration mode, we first set dhcp for eth0 and after a static IP for eth1, each setting is followed by a single line ending with [edit] to indicate that each command was successfully run.
set interfaces ethernet eth0 address dhcp
set interfaces ethernet eth0 description 'OUTSIDE'
set interfaces ethernet eth1 address '192.168.152.10/24'
set interfaces ethernet eth1 description 'INSIDE'
Address setting
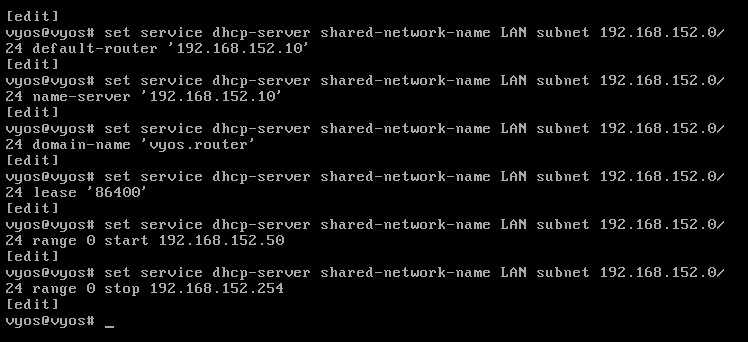
Still in configuration mode we set the DHCP and DNS services for the internal/LAN network, where VyOS will act as the default gateway and DNS server.
192.168.152.10/24is the default gateway .- The address range 192.168.152.2/24 - 192.168.152.49/24 will be reserved for static assignments
- DHCP clients will be assigned IP addresses within the range of 192.168.152.50 - 192.168.152.254 and have a domain name of vyos-router
- DHCP address will be leased for 24 hours i.e 86400 secondes
- VyOS will serve as a full DNS server, replacing the need to utilize Google, Cloudflare, or other public DNS servers (which is good for privacy)
- Only hosts from your internal/LAN network can use the DNS server
set service dhcp-server shared-network-name LAN subnet 192.168.152.0/24 option default-router '192.168.152.10'
set service dhcp-server shared-network-name LAN subnet 192.168.152.0/24 option name-server '192.168.152.10'
set service dhcp-server shared-network-name LAN subnet 192.168.152.0/24 option domain-name 'vyos.router'
set service dhcp-server shared-network-name LAN subnet 192.168.152.0/24 lease '86400'
set service dhcp-server shared-network-name LAN subnet 192.168.152.0/24 range 0 start 192.168.152.50
set service dhcp-server shared-network-name LAN subnet 192.168.152.0/24 range 0 stop '192.168.152.254'

set service dns forwarding listen-address 192.168.152.10
set service dns forwarding allow-from 192.168.152.0/24
set service dns forwarding cache-size 10240
Setting SNAT rule
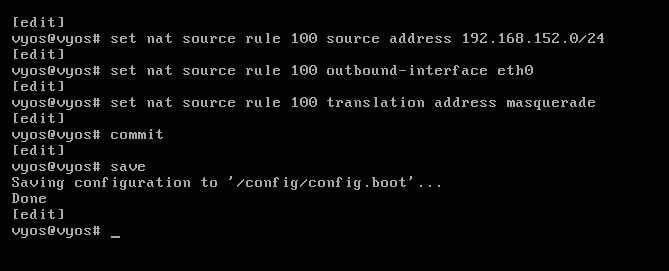
The following settings will configure SNAT rules for our internal network(LAN), allowing hosts to communicate through the outside network (WAN) via ip masquerade , after the setting use commit than save commandes .
set nat source rule 100 outbound-interface name 'eth0'
set nat source rule 100 source address '192.168.152.0/24'
set nat source rule 100 translation address masquerade
commit
save
Adding DNS server
The following command will use Cloudfare, Google, and Quad9 as DNS relays.
set service dns forwarding name-server 1.1.1.1
set service dns forwarding name-server 8.8.8.8
set service dns forwarding name-server 9.9.9.9
set system name-server 1.1.1.1
Testing network
- Check for interfaces :
show interface.
- Verify network connection with
host vyos.org.
- Verify nat rule :
show nat source rule.
- Verify the dns setting configuration in configuration mode :
configureand thenshow service dns.
Installation Of Ubuntu Desktop
I use a virtual box image for the installation that is avalaible on osboxes use this link to dowload the ubuntu virtual image .
If you downloaded the file, extract it, and you can start the installation using the Virtual Manager user interface.
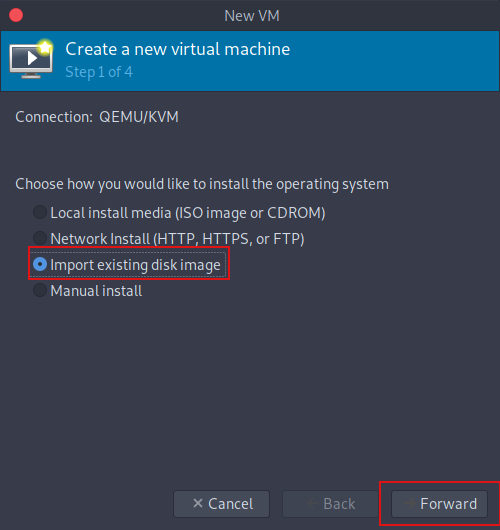
- Use the create machine button on virt manager.
- Check to import an existing disk image to use the virtual box virtual image; for me, I’m using a virtual box image (.vdi).
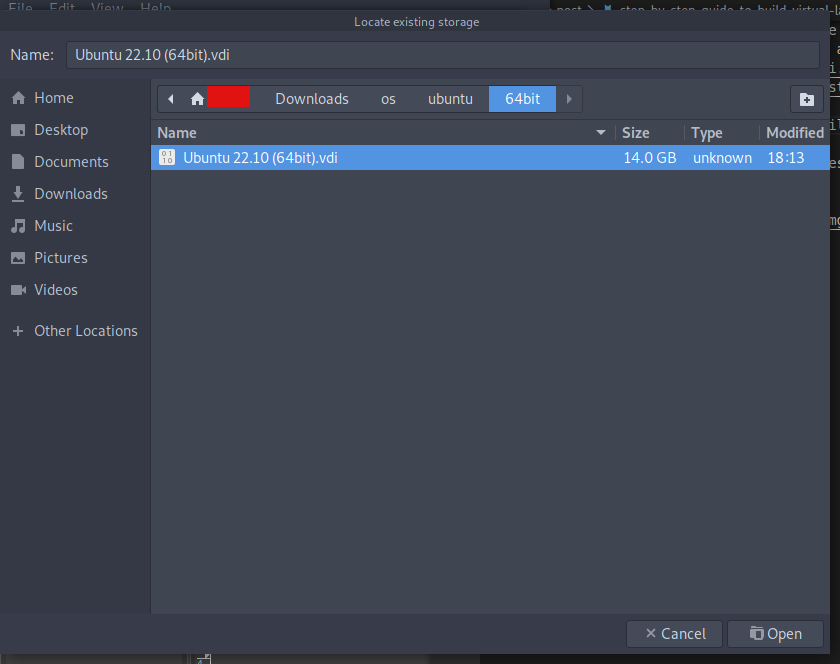
- You hit browse to access your file manager, then you locate the virtual image. The steps are the same as for the VYOS installation.
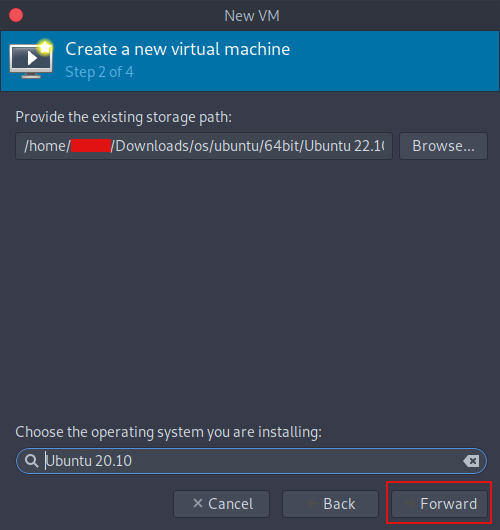
- If you selected the correct file you can proceed with ‘
Forward’.
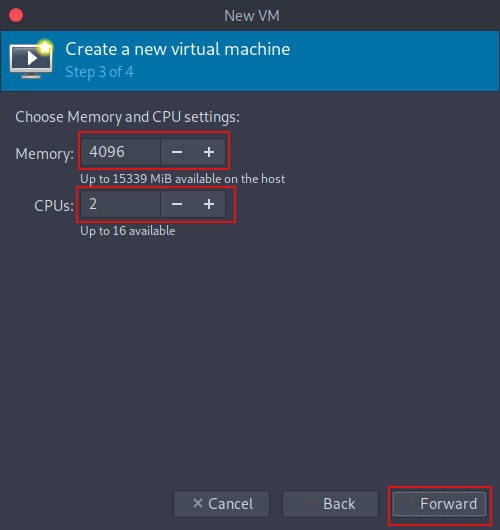
- The cpu and memory setting .
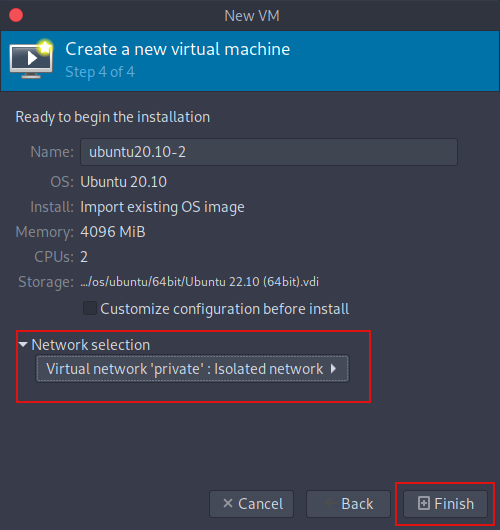
- Because we used a virtual image as installation media , there is no hard drive setting so we end up by setting the name for our ubuntu desktop and we set the network to the private switch so it will be part of the LAN .
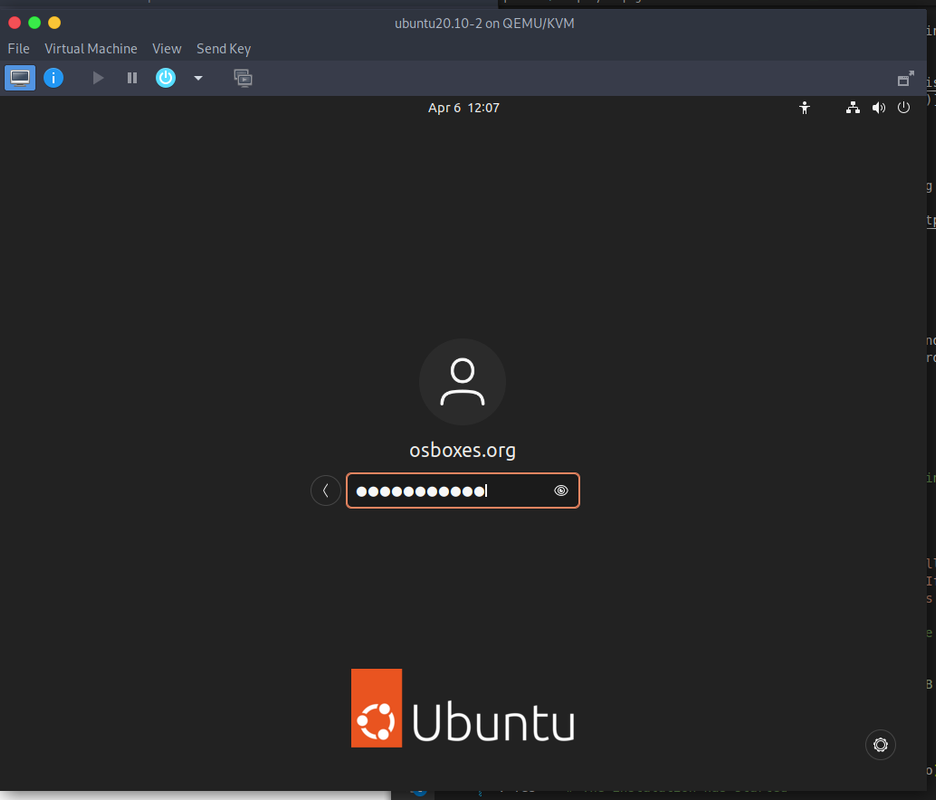
- If you downloaded the virtual image from osboxes the default username and password are ‘osboxes.org’ .
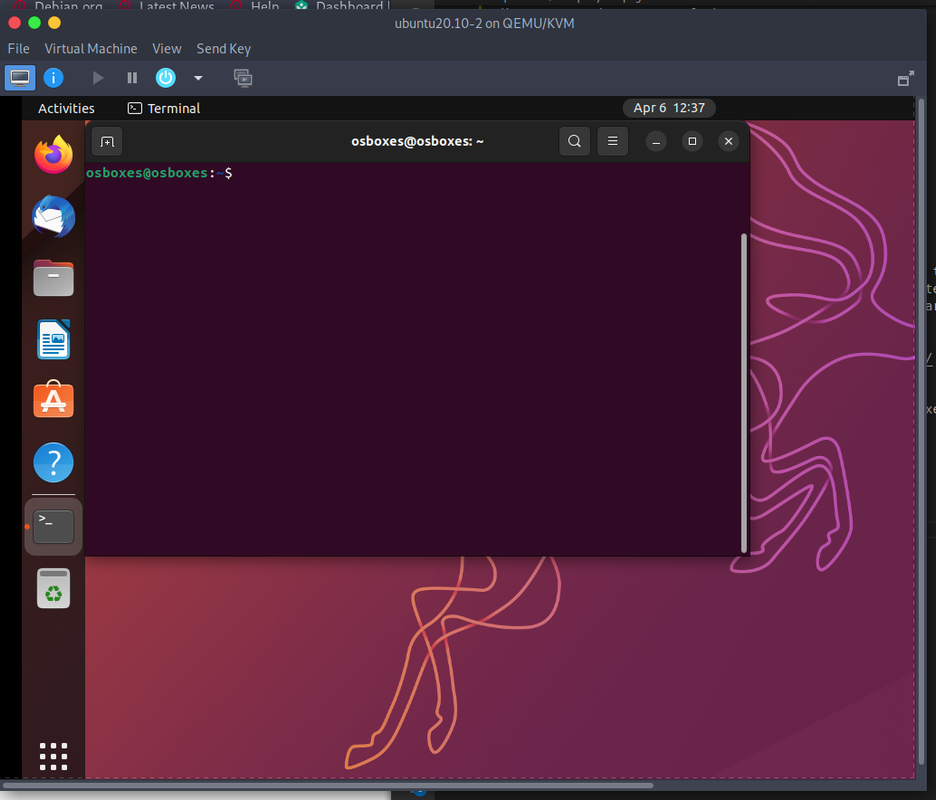
- In the ubuntu desktop use
Crtl+Alt+Tto open a terminal .
- Check the name of your ethernet interface with
ip link showthis name is very important for the next part .
- Set a static ip to the ubuntu desktop , to do so open the file
/etc/netplan/01-network-manger-all.yamlas root with text editor and you make the following change- Replace enp1s0 with the name of your own interface
- In this configuration we set a static ip : 192.168.152.15 . The default gateway and the dns relay .
# Let NetworkManager manage all devices on this system
network:
    version: 2
    renderer: NetworkManager

    ethernets:
        enp1s0:
            addresses:
                - 192.168.152.15
            routes:
                - to: default
                  via: 192.168.152.10
            nameserver:
                addresses: [192.168.152.10]
- Run
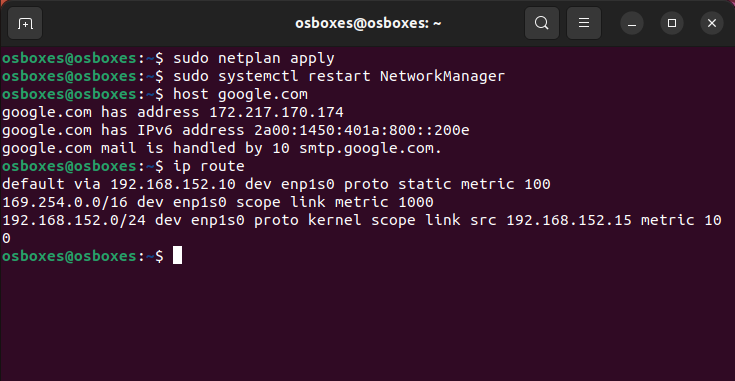
sudo netplan applyin a shell to make the change take effect, thensudo systemctl restart NetworkManagerto restart the NetworkManager service followed byhost google.comto test hostname resolution.
- If the command
netplan applyreturns errors, most likely the issue is in the/etc/netplan/01-network-manager-all.yamlconfiguration file. A (.yaml) config file can be tricky, so if you have a hard time writing it, here is the same configuration in a JSON format that you can convert to (.yaml) format using an online tool like jsontoyaml .
// Network configuration in JSON format , need to be converted into YAML file
//Let NetworkManager manage all devices on this system
{
    "network": {
        "version": 2,
        "renderer": "NetworkManager",
        "ethernets": {
            "enp1s0": {
                "addresses": [
                    "192.168.152.15"
                ],
                "routes": [
                    {
                        "to": "default",
                        "via": "192.168.152.10"
                    }
                ],
                "nameserver": {
                    "addresses": [
                        "192.168.152.10"
                    ]
                }
            }
        }
    }
}
Installation of kali linux
-
Download the installation file for Kali Linux, in my case I use a qemu vitual image , but you can use any Kali installation media that you have. Here the link to download Kali .
-
If you have a Kali Linux setup to install, you can start the installation with the
Virtual Managerapplication. -
Use the
Create New Virtual Machinebutton .
- Check
Import Existing disk imageif you are using a virtual image like me.
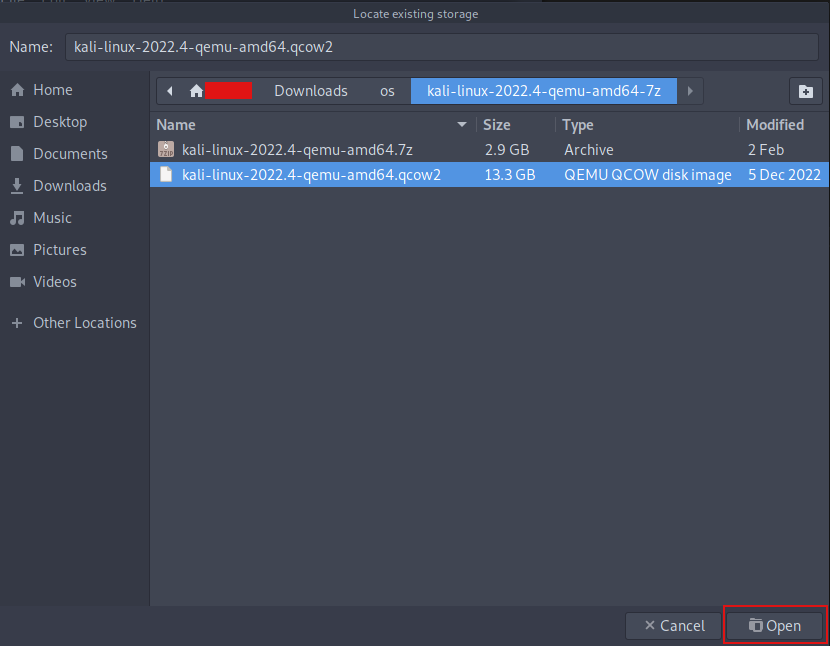
- You hit Browse to access your file manager, then you locate the pre-built image. The steps are the same for the VYOS installation .
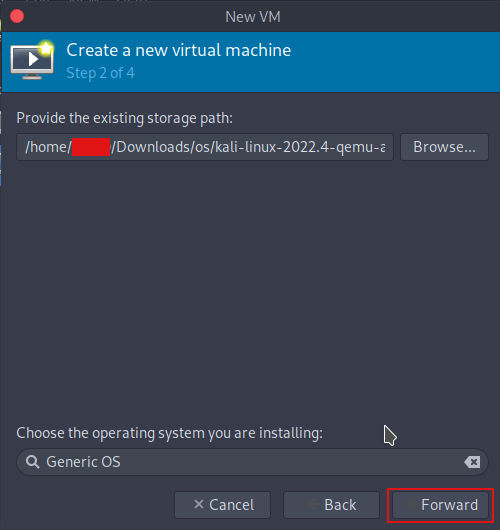
- After the selection of the installation media it should look like this.
- The CPU and RAM setting .
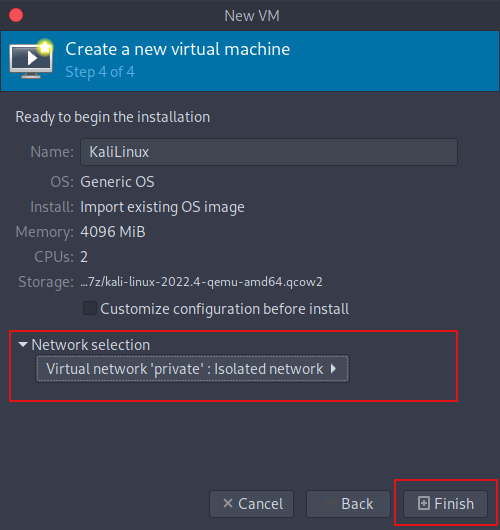
- To finish you set name and you put this machine in the LAN by using
privateas network switch .
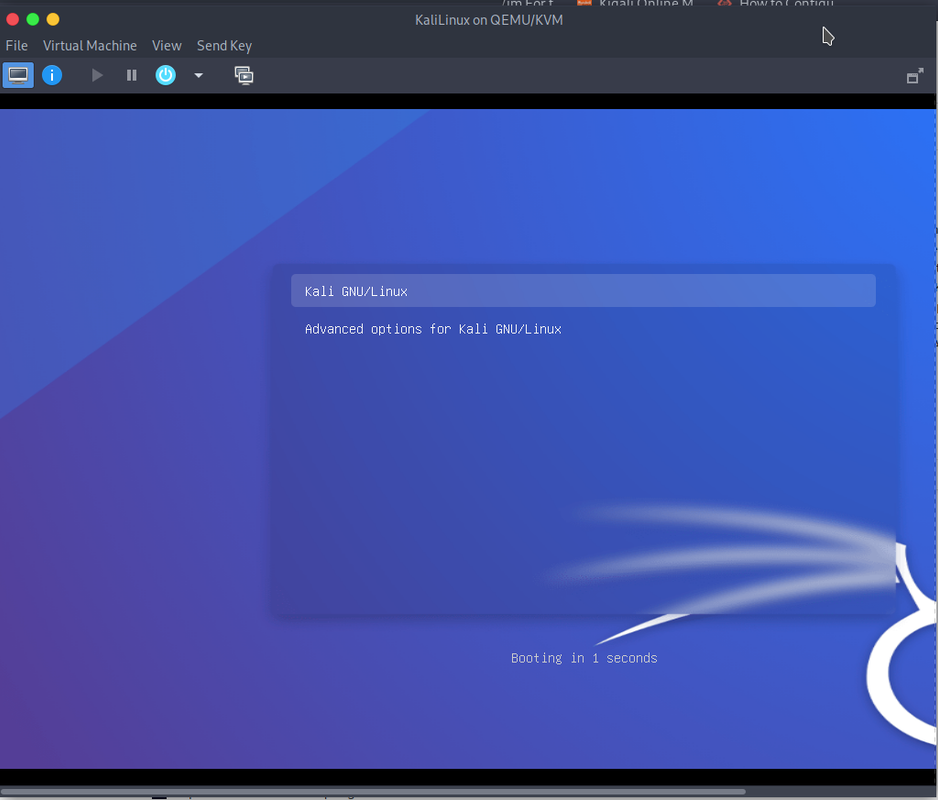
- A successfull installation will redirect you to the Kali Linux Grub .
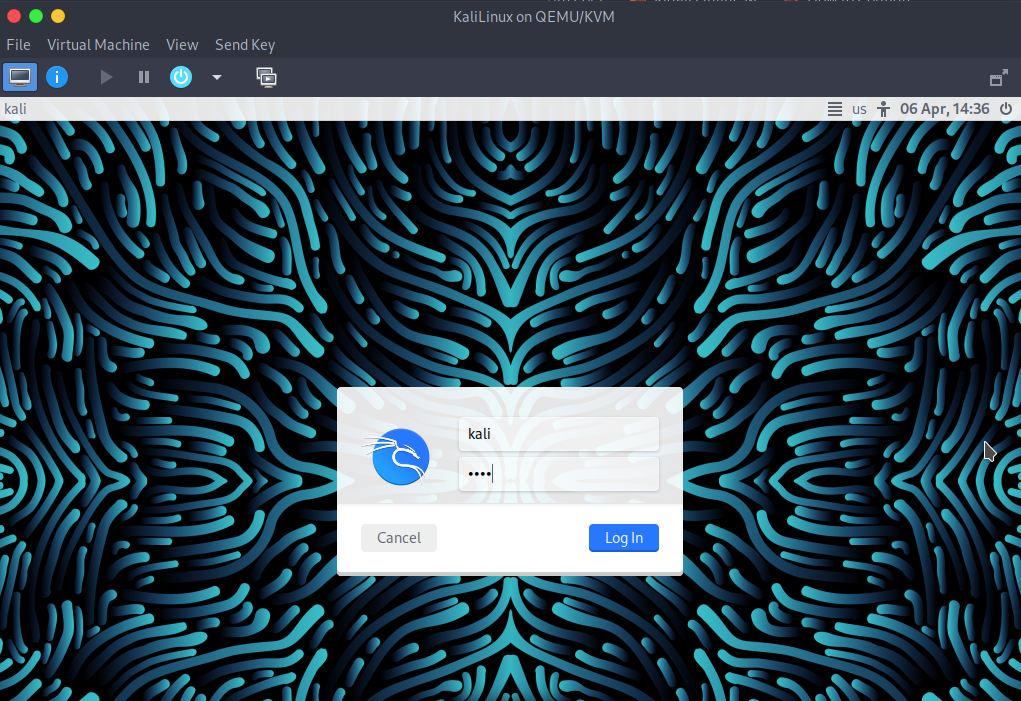
- The default user is ‘kali’ with passwork ‘kali’ .
- Open a terminal in the Kali machine; on the terminal, use
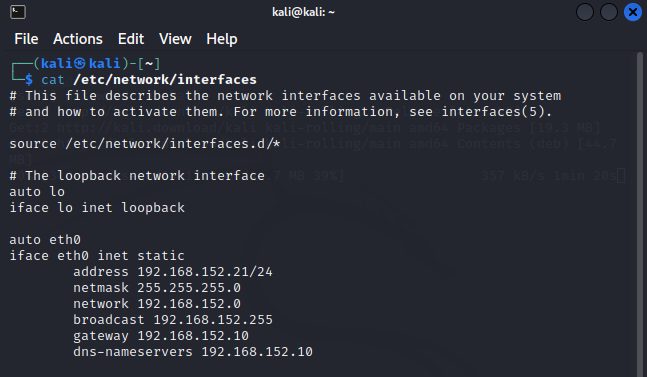
ip link showto see the name of your network interface. My interface is named eth0, and knowing that, I can start to set a static IP. With sudo, open the file/etc/network/interfaceand edit it as follows:
# This file describe the network interfaces availabel on your system
# and how to activate them. For more information, see interfaces(5).

source /etc/network/interfaces.d/*

# The loopback network interface
auto lo
iface lo inet loopback

auto eth0
iface eth0 inet static
    address 192.168.152.21
    netmask 255.255.255.0
    network 192.168.152.0
    broadcast 192.168.152.255
    gateway 192.168.152.10
    dns-nameservers 192.168.152.10
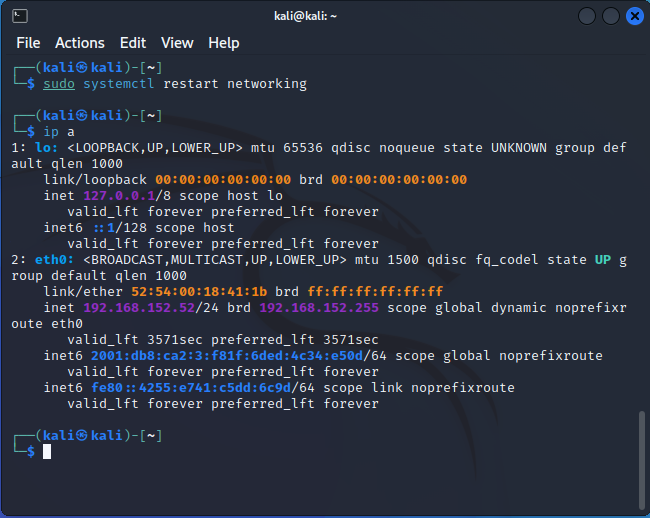
- Save the file, then run
sudo systemctl restart networkingto apply the change.You can now see the change withip a.
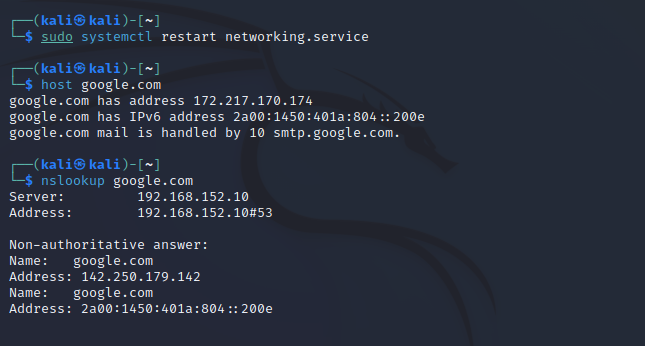
- Check for hostname resolution with
nslookup google.comyou should see the address of the vyos router in the output .
Installation of Metasploitable2
Metasploitable2 (Linux) Metasploitable is an intentionally vulnerable Linux virtual machine. This VM can be used to conduct security training, test security tools, and practice common penetration testing techniques.
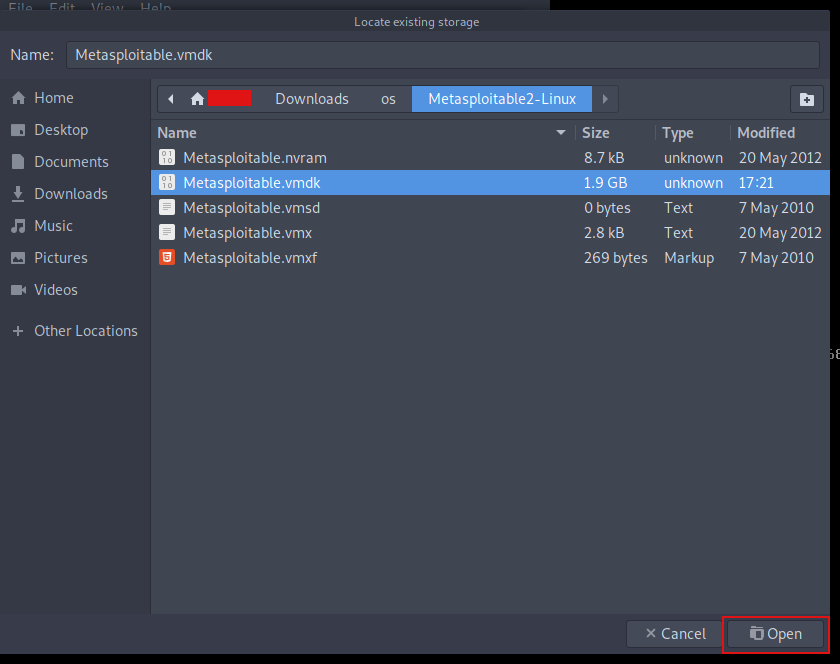
First, you have to download the operating system if it is not already done. After extracting the file, you can use the Virtual Manager user interface to install the machine.
- The installation media is a virtual image .
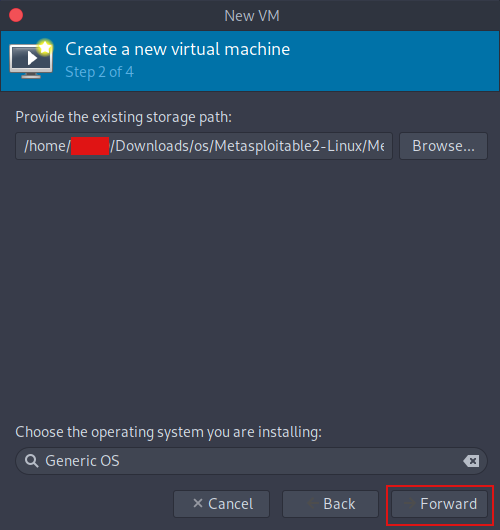
- If you are done with the operating system selection you can proceed .
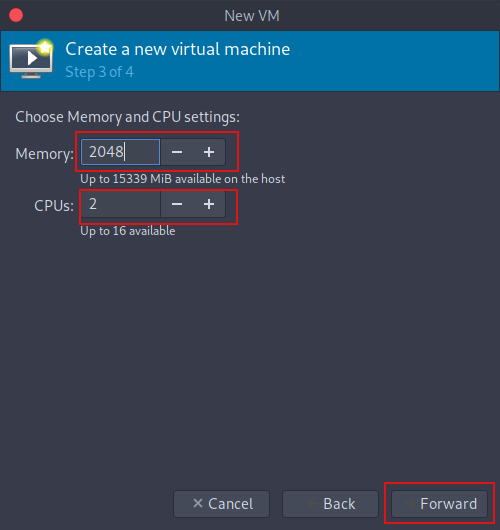
- Setting CPU and RAM according to the host machin specifications .
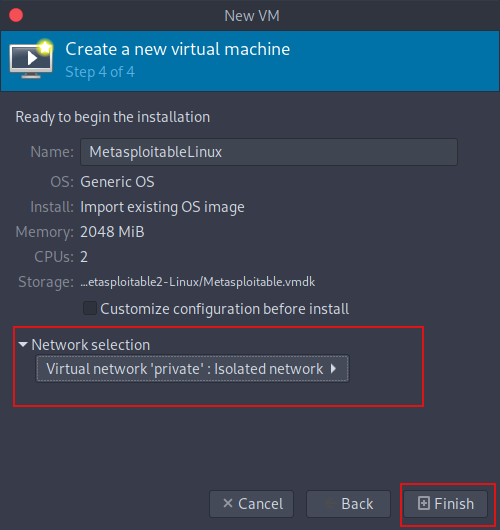
- Finally, give a name to the machine and include it in the LAN by using the private isolated network as an interface.
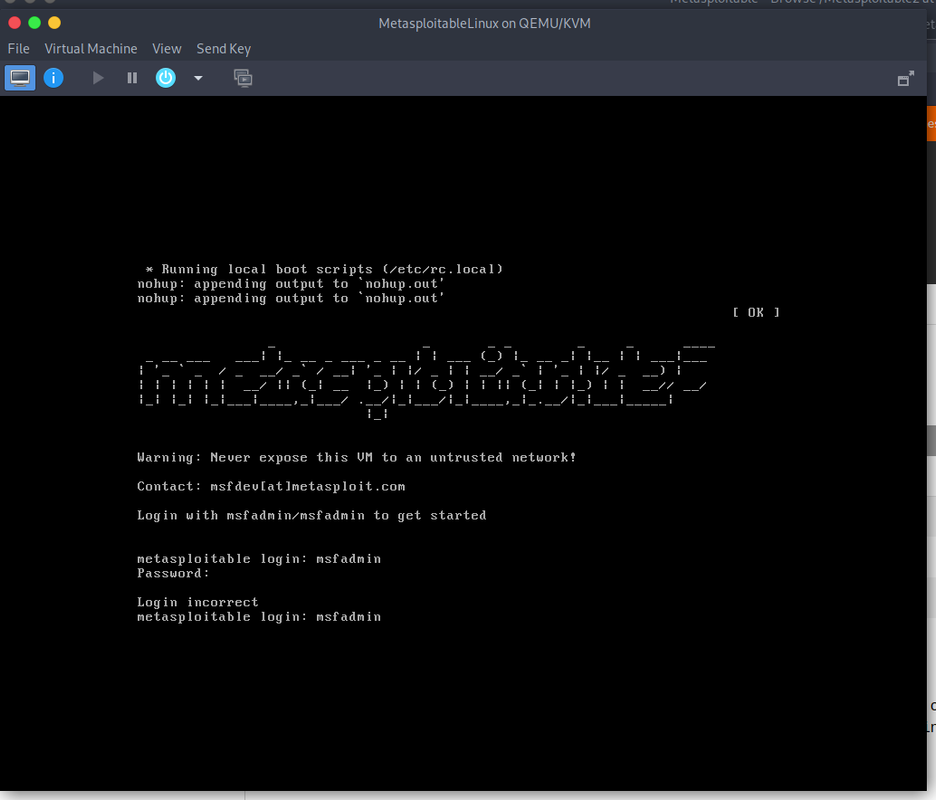
- The installation should be ok. Use the default username ‘msfadmin’ and password ‘msfadmin’ to log in.
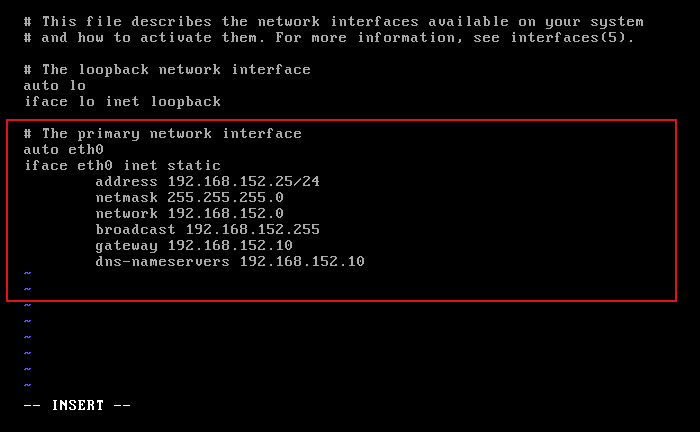
- Use
sudo vim /etc/network/interfacesto set a static ip for the Metasploitatble2 machine. In vim, you have to enter insert mode with i to edit ; to save and quit, you use Esc; then :qw, make the following change into the file :
- Apply the change with
sudo /etc/inid.d/networking restart
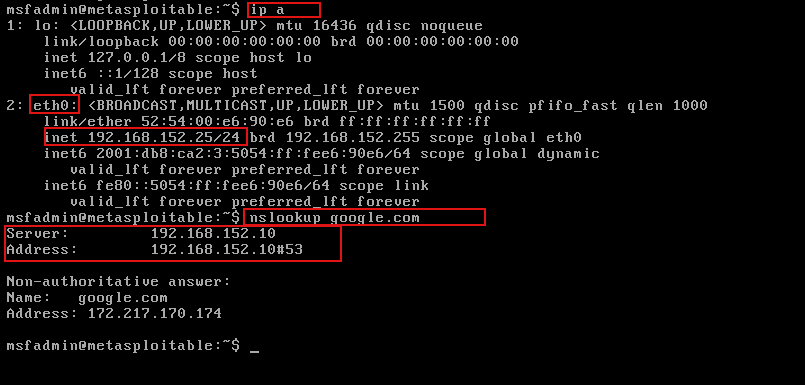
- Verify the setting by doing nslookup and making sure that the vyos address
192.168.152.10is present in the output
Conclusion
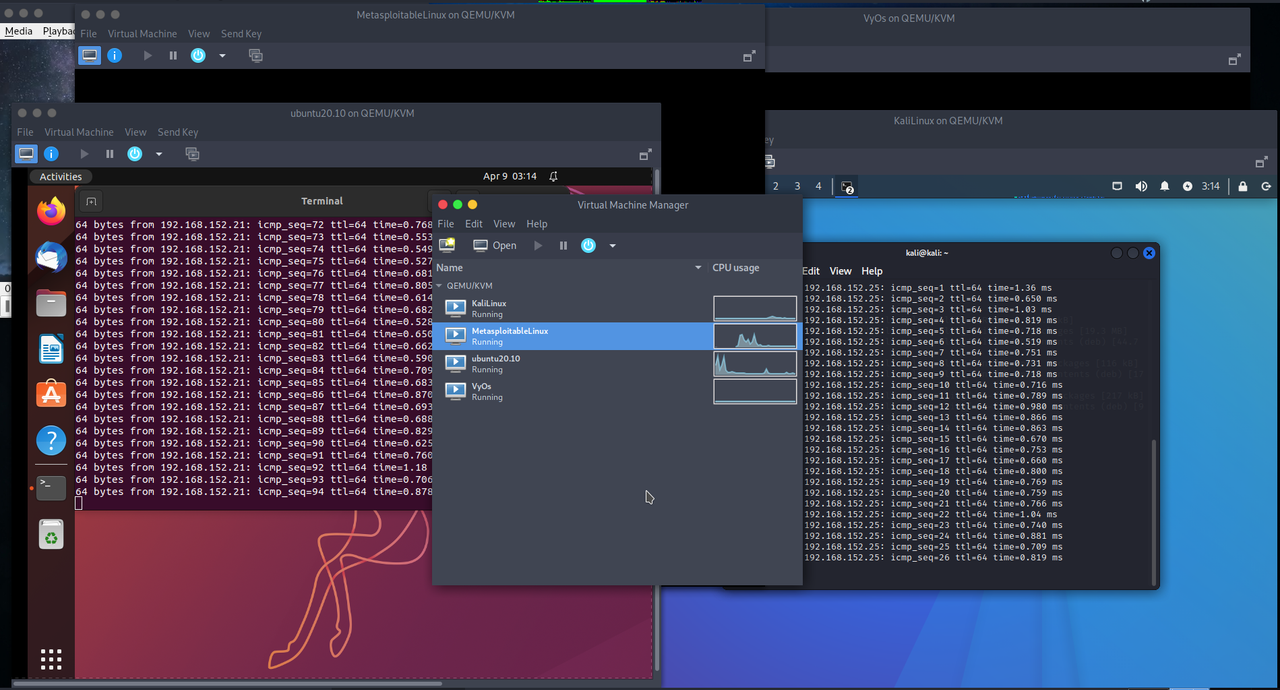
If you followed all the steps, you should have up to five operating systems on your machine, counting your guests.
In conclusion, creating a virtual laboratory for penetration testing is a great way to ensure a safe and efficient environment for carrying out various testing procedures. With KVM, you can easily create and manage virtual machines and provide yourself with a complete isolated environment.
It is important to note that penetration testing should only be done with the proper authorization and consent of the target organization. Otherwise, it can be considered illegal and unethical. This emphasizes the importance of owning your own laboratory as an ethical hacker to avoid complications with the law.
If you’re interested in learning more about cybersecurity and related topics, check out our other articles on this blog. In particular, you may want to read our article on the implementation of a botnet, which can be used for various purposes, including distributed denial-of-service (DDoS) attacks and spam campaigns, the perfect exercice to start experimenting with your virtual laboratory . Click here to read the article: simple-botnet.
Thank you for reading, and we hope this article has been informative and helpful. If you want to propose any improvement or if you notice any mistakes, contact me via Email.

